How to Winterize a Camper: Cold Weather Preparation
As the leaves change and the temperatures drop, preparing your camper for the cold months ahead is essential. Winterizing your camper is crucial to prevent damage and ensure that it's ready for use when the warm days of spring return. This guide will walk you through each step of the winterization process so your camper stays in excellent condition during winter.
Understanding the Importance of Winterizing Your Camper
Winterizing your camper is not just a good idea; it's a necessity. The cold weather can wreak havoc on your vehicle's plumbing systems, electronics, and overall structure. Preparing your camper for winter can save you significant repair costs and make for a smoother start when it's time for your next adventure.
Being proactive ensures you can confidently hit the road in the spring. It keeps your investment safe and ready for all your future travels, allowing you to focus on what matters—making memories with family and friends.
Clean and Declutter
Before diving into the more technical aspects of winterization, start by cleaning the camper thoroughly, including removing any food, personal items, and trash. Accumulated debris can attract pests and lead to unpleasant odors over time. It's also a good idea to check all compartments and storage areas. Small items can easily be forgotten or overlooked and may lead to surprises when you reopen the camper in the spring. A thorough inspection can help you identify any items needing repair or replacement before your next trip.
Next, wipe down all surfaces to prevent mold and mildew growth. Use appropriate cleaning supplies, particularly in wet areas like the kitchen and bathroom. Pay special attention to the refrigerator, as leftover food can create many problems. Check the icemaker is empty as well, standing water can cause water damage. Remove the water filter that might be in place, as this is also a place where water collects.Additionally, consider using vinegar and water as a natural cleaning solution; it's effective and safe for most surfaces. After cleaning, leave the doors open to air out the camper, which can help eliminate any lingering moisture that might encourage mold development.

Finally, ensure that all small items are stored or secured. When you pull the camper out again, you'll want it to be just as you left it—a clean, clutter-free space ready for adventure. Organizing your gear in labeled bins can make it easier to find what you need when you're ready to hit the road again. Moreover, taking the time to sort through your camping equipment can also help you identify any items that are no longer needed, allowing you to donate or discard them, thus optimizing your space for future trips. A well-organized camper enhances your efficiency and contributes to a more enjoyable camping experience.
Drain All Water Systems
Once your camper is clean, it's time to focus on the water systems. Start by draining all tanks, including the fresh water tank, gray water tank, and black water tank. This step is critical to prevent freezing, which can cause cracks and leaks. Gathering all necessary tools, such as a hose, a bucket, and a wrench, is an excellent idea to make the process smoother. Additionally, check the manufacturer's guidelines for specific instructions for your camper model, as different systems may have unique requirements.
Remember to flush the toilet and drain the water lines as well. Make sure to open all faucets to allow the water to flow out completely. Using gravity to your advantage can help ensure no residual water is left behind. After draining, consider using an RV antifreeze solution in the plumbing system to protect against freezing temperatures. This non-toxic antifreeze is explicitly designed for RVs and can help safeguard your pipes and fixtures during the cold months.
Furthermore, while you are working on the water systems, take a moment to inspect the hoses and fittings for any signs of wear or damage. Cracks or leaks can lead to more significant problems, so replacing any compromised parts before storing your camper is wise. Additionally, cleaning the freshwater system should be considered to eliminate any lingering odors or bacteria. Keep your camper fresh and ensure your water supply remains safe for future use. By taking these extra steps, you can maintain the integrity of your camper's water systems and enjoy peace of mind when you're ready to hit the road again.
Blow Out the Water Lines (Optional)
Some take another step and blow out the water lines using an air compressor to eliminate any remaining water. Attach the compressor to the city water inlet and blow compressed air through the lines. It is essential to be cautious with this step; too much pressure can damage the lines.
If you opt for this method, remember to open all faucets throughout the camper to allow air to escape as you purge the lines. This will help ensure no water remains trapped in those tight spaces.
Blown-out water lines can help maintain your plumbing system's integrity by preventing potential freeze damage during colder months. Removing residual water reduces the chances of mold and mildew developing within the lines, which can lead to unpleasant odors and health concerns. Furthermore, this practice can enhance the longevity of your water system, saving you from costly repairs down the road.
It's also worth noting that if you're uncomfortable using an air compressor or don't have one readily available, there are alternative methods to consider. Some RV enthusiasts recommend using a hand pump or a wet/dry vacuum to remove water from the lines. While these methods may require more manual effort, they can still effectively clear out any lingering moisture without the risks associated with high-pressure air. Regardless of your chosen method, ensuring that your water lines are dry is crucial in winterizing your camper.
Add RV Antifreeze
After draining and possibly blowing out the water lines, it's time to add RV antifreeze. This specially formulated antifreeze is specifically for use in RV water systems. It is safe for pipes and won't pose a risk to plumbing systems. Unlike traditional automotive antifreeze, RV antifreeze is non-toxic and designed to protect your plumbing from freezing temperatures, leading to costly repairs if not adequately addressed.
To use antifreeze:
- Pour it into the fresh water tank as per the manufacturer's instructions.
- Turn on your water pump to allow the antifreeze to flow through the water lines.
- Open each faucet until you see the pink liquid come out, ensuring that the antifreeze gets into every line, including the toilet and outside shower, if applicable.
It's also a good idea to flush the toilet a few times to ensure the antifreeze reaches the holding tank, providing additional protection against freezing.
Additionally, remember to check your water heater. If it has a bypass valve, engage it before adding antifreeze to prevent it from entering the water heater tank, as this can waste antifreeze and may not be necessary for winterization. After you've completed this process, consider running the water pump for a minute or two to ensure that the antifreeze is thoroughly distributed throughout the system. This extra step can help provide peace of mind, knowing that every part of your RV's plumbing is safeguarded against the harsh winter elements.
Finally, remember to store your RV antifreeze in a cool, dry place away from direct sunlight and out of reach of pets and children. Proper storage not only extends the shelf life of the antifreeze but also ensures safety. When it's time to de-winterize your RV in the spring, you'll be glad you took the time to properly winterize your system, allowing for a smooth transition back to camping adventures without the worry of leaks or damage from freezing temperatures.
Protect the Exterior
Now that the interior is winterized turn your attention to the exterior. Start by giving your camper a good wash to remove dirt, sap, or grime. Make sure to dry it thoroughly afterward to prevent water spots and rust. Ensure the awning is fully closed and secure. Are the propane tanks closed and disconnected? Check the roof for any debris or sharp edges that could rip a cover if you install one.
Next, inspect the seals around windows, doors, and vents. It would be best to address any cracks or wear you notice. Use appropriate sealants to prevent water intrusion during winter rains or snows. Additionally, consider applying a protective wax or sealant to the exterior paint to shield it from the elements.
Prepare Tires and Stabilizers
Tire care is essential for winter storage. Check the tire pressure and inflate as necessary since tires can lose air in colder temperatures. It would be best to elevate the camper on jacks to relieve pressure from the tires while it's stored.
Ensure stabilizers are in good working condition and that any moving parts are lubricated. This will help avoid rust and wear so that the camper is ready for your next adventure.
Protect the Battery
Next, focus on the battery. It is best to remove the battery from the camper and store it in a warmer environment. However, if this isn't feasible, make sure to disconnect the battery terminals and clean any corrosion off them.

For optimal care, charge the battery periodically during winter to ensure that it is ready to go when you need it next season.
Prevent Pests
Rodents and insects seek shelter in the cold, and your camper can look like their perfect home. Consider placing mouse traps or natural deterrents like peppermint oil in various corners of the camper.
Another effective method is to seal up any openings, especially around pipes and vents. Store your camper with screens on windows and vents to keep unwanted guests out during the off-season.
Final Check and Storage
Before you close up shop for the winter:
- Perform a thorough final check of the camper.
- Go through each step of your winterization process to ensure you followed every step.
- Once satisfied, cover your camper with a breathable RV cover to protect it from the elements while allowing moisture to escape.
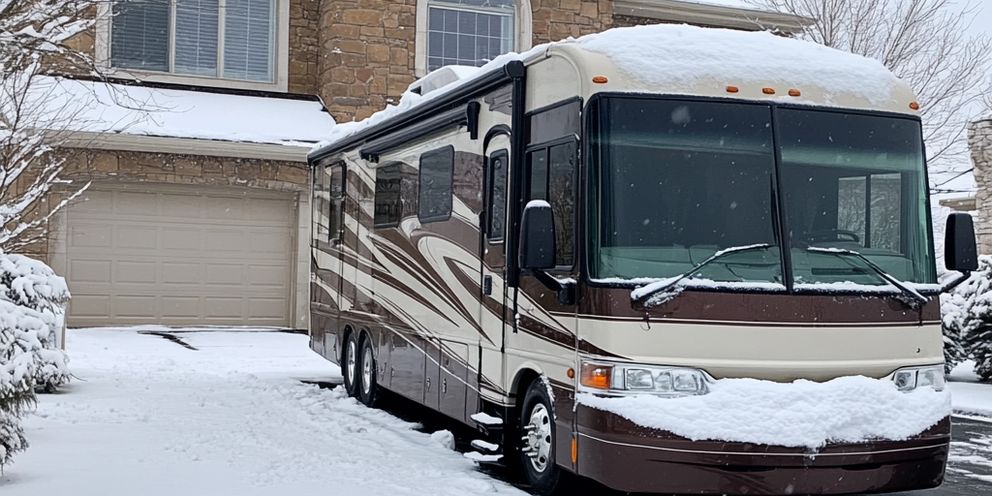
Store your camper in a dry, secure location. If you cannot use a dedicated RV storage facility, an RV cover is a must.

As you take the necessary steps to winterize your camper and safeguard it from the harsh winter conditions, don't take notice of the importance of a high-quality cover. CarCovers.com offers a selection of premium covers perfect for keeping your camper shielded from snow, ice, and winter debris. With a recreational vehicle cover from CarCovers.com, you can rest assured that your camper will remain protected throughout the off-season, ready for your next spring adventure. Find My Vehicle Cover today and give your camper the protection it deserves.
Updated